Connect Streamlit to AWS S3
Introduction
This guide explains how to securely access files on AWS S3 from Streamlit Community Cloud. It uses Streamlit FilesConnection, the s3fs library and optionally Streamlit's Secrets management.
Create an S3 bucket and add a file
Note
If you already have a bucket that you want to use, feel free to skip to the next step.
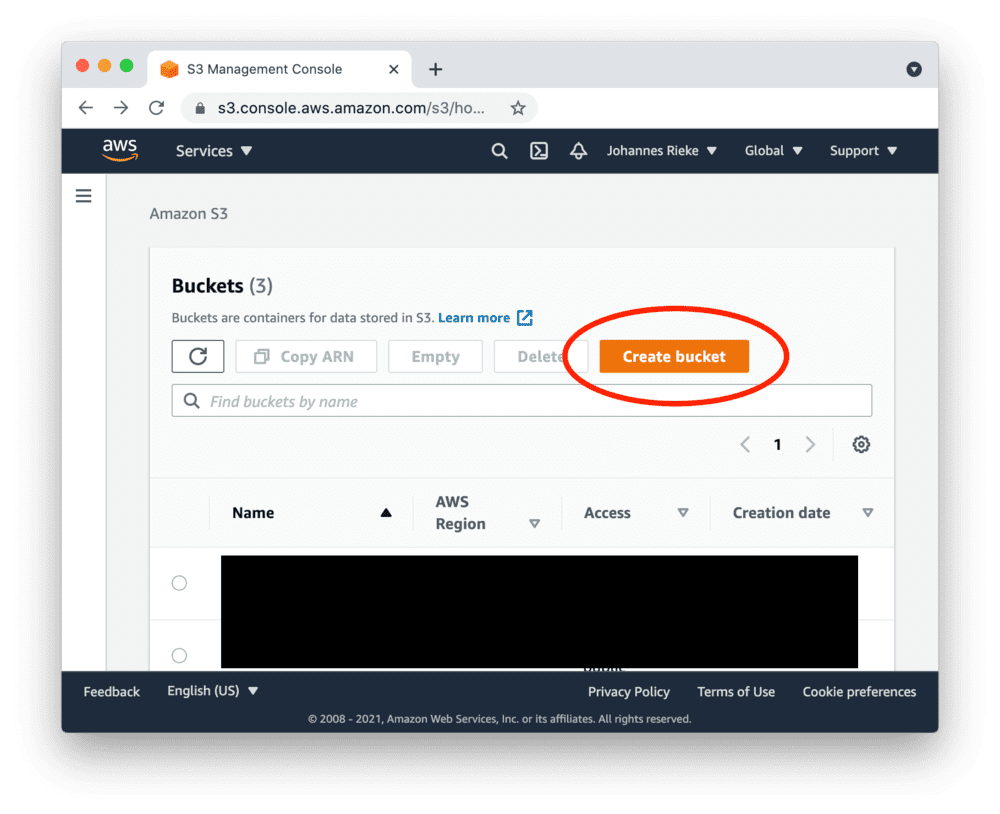
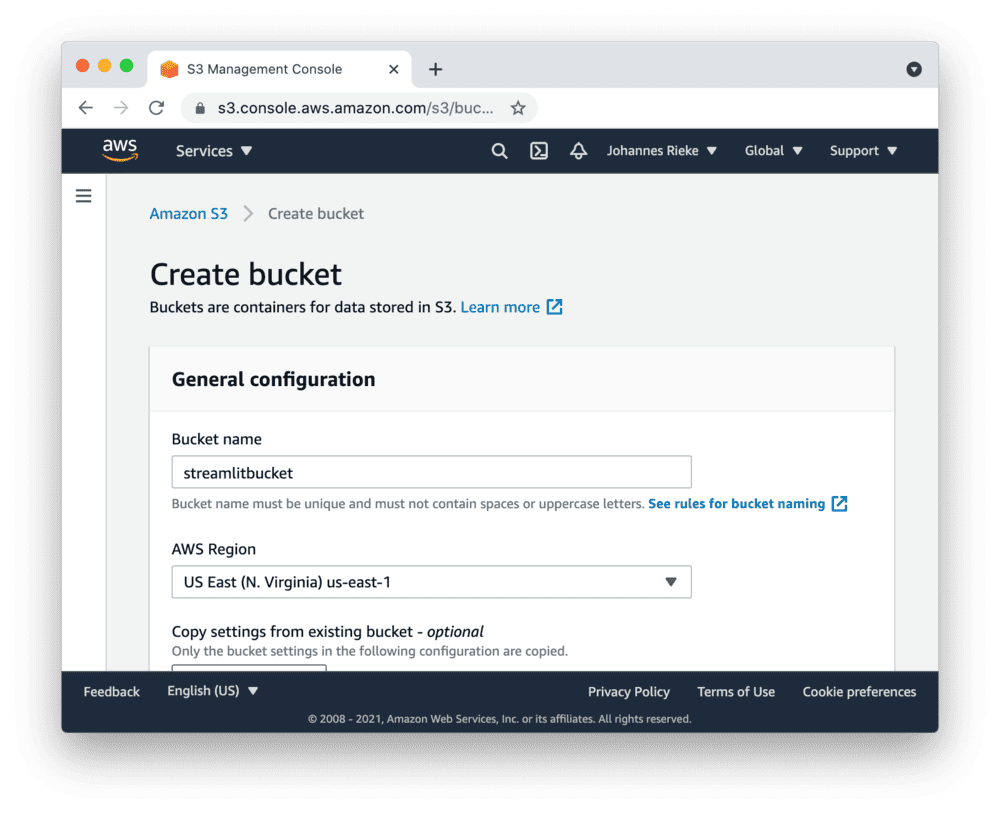
First, sign up for AWS or log in. Go to the S3 console and create a new bucket:
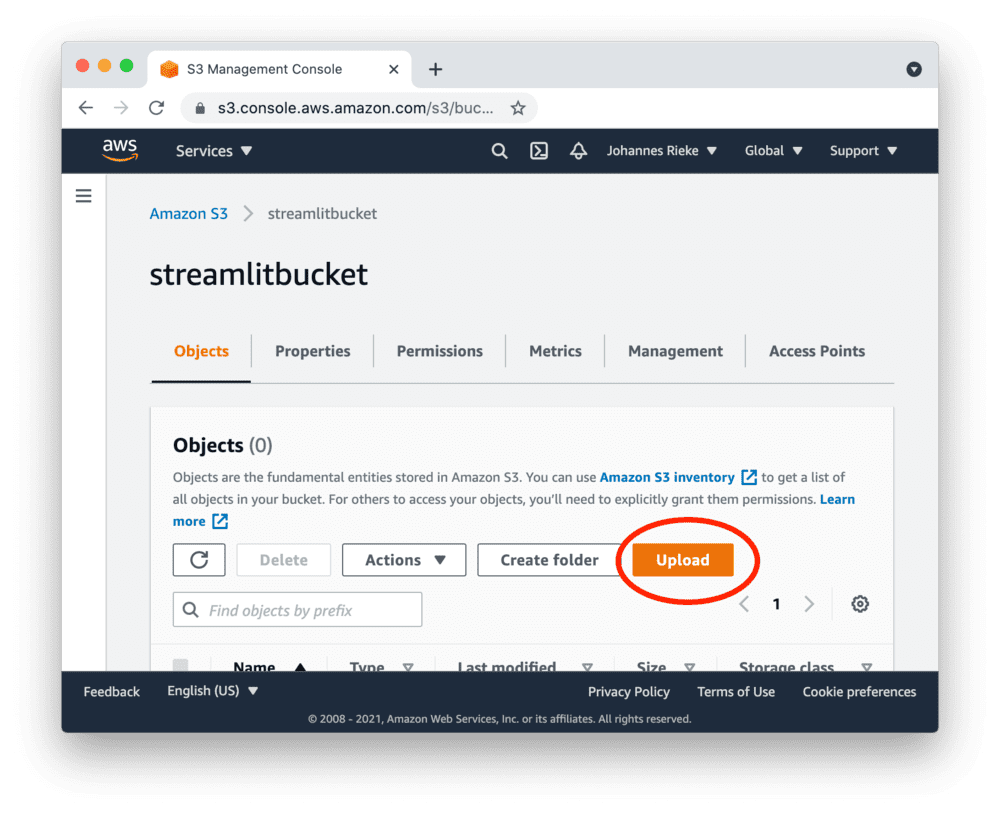
Navigate to the upload section of your new bucket:
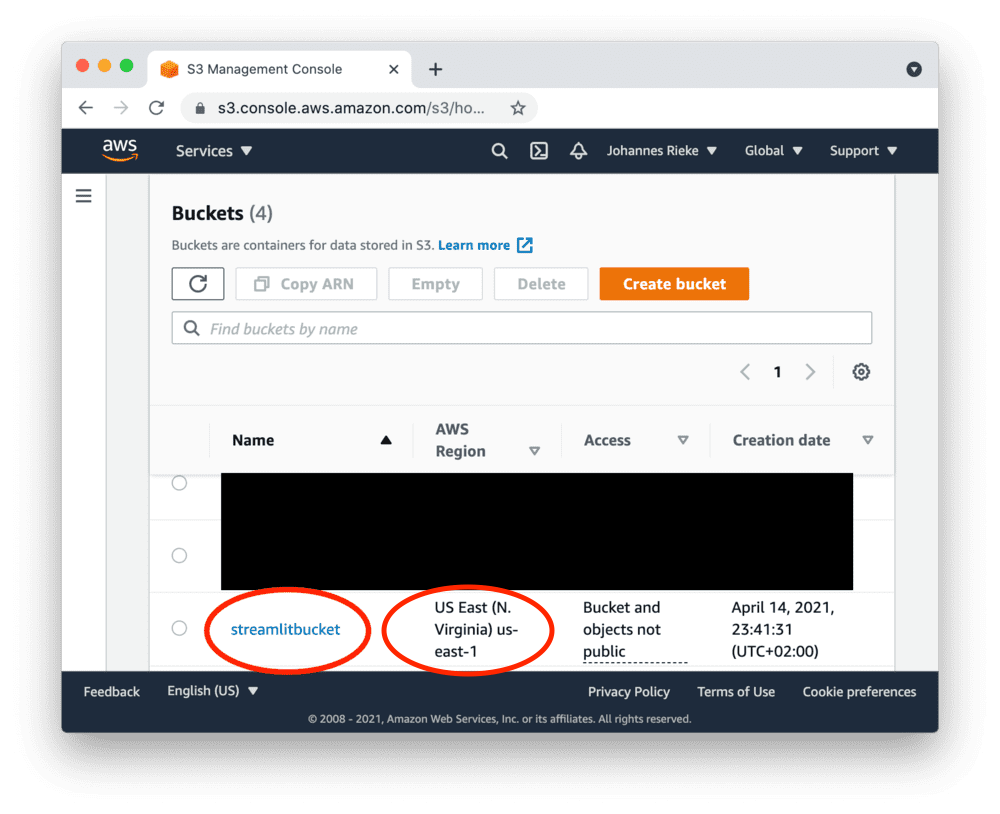
And note down the "AWS Region" for later. In this example, it's us-east-1, but it may differ for you.
Next, upload the following CSV file, which contains some example data:
myfile.csvCreate access keys
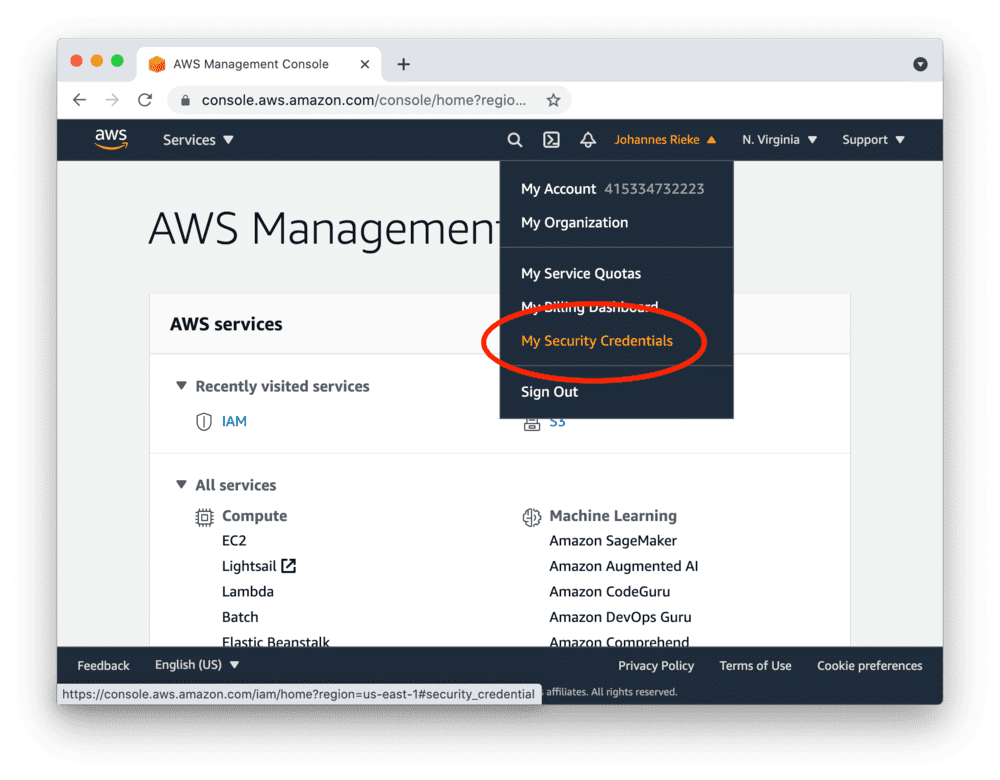
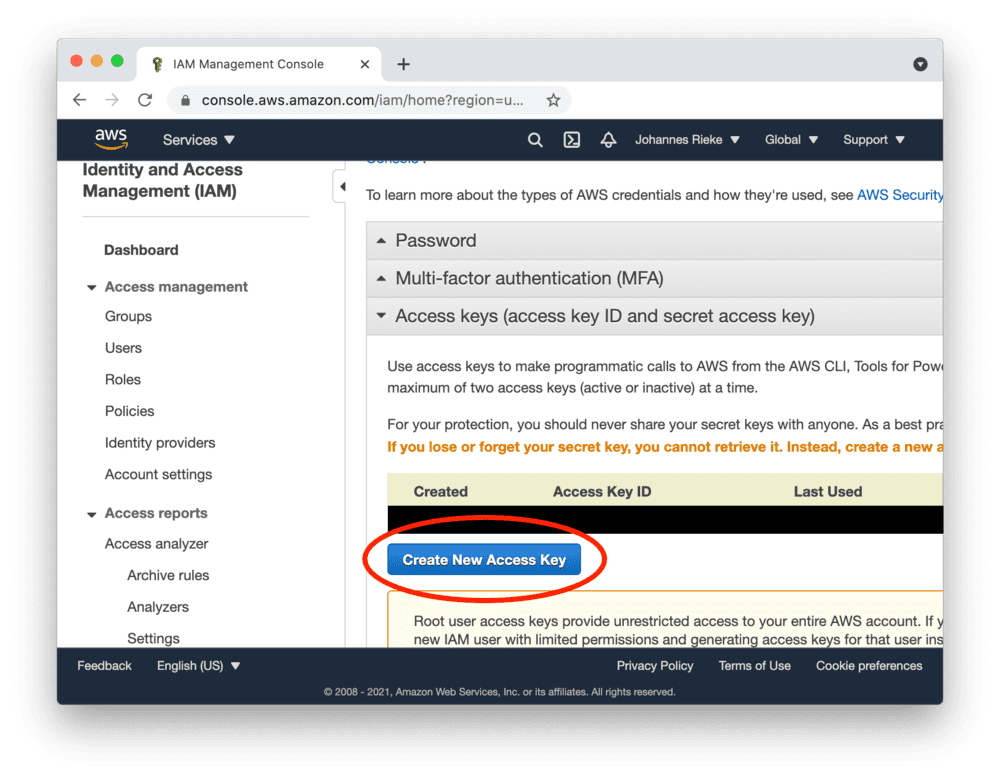
Go to the AWS console, create access keys as shown below and copy the "Access Key ID" and "Secret Access Key":
Tip
Access keys created as a root user have wide-ranging permissions. In order to make your AWS account more secure, you should consider creating an IAM account with restricted permissions and using its access keys. More information here.
Set up your AWS credentials locally
Streamlit FilesConnection and s3fs will read and use your existing AWS credentials and configuration if available - such as from an ~/.aws/credentials file or environment variables.
If you don't already have this set up, or plan to host the app on Streamlit Community Cloud, you should specify the credentials from a file .streamlit/secrets.toml in your app's root directory or your home directory. Create this file if it doesn't exist yet and add to it the access key ID, access key secret, and the AWS default region you noted down earlier, as shown below:
# .streamlit/secrets.toml
AWS_ACCESS_KEY_ID = "xxx"
AWS_SECRET_ACCESS_KEY = "xxx"
AWS_DEFAULT_REGION = "xxx"
Important
Be sure to replace xxx above with the values you noted down earlier, and add this file to .gitignore so you don't commit it to your GitHub repo!
Copy your app secrets to the cloud
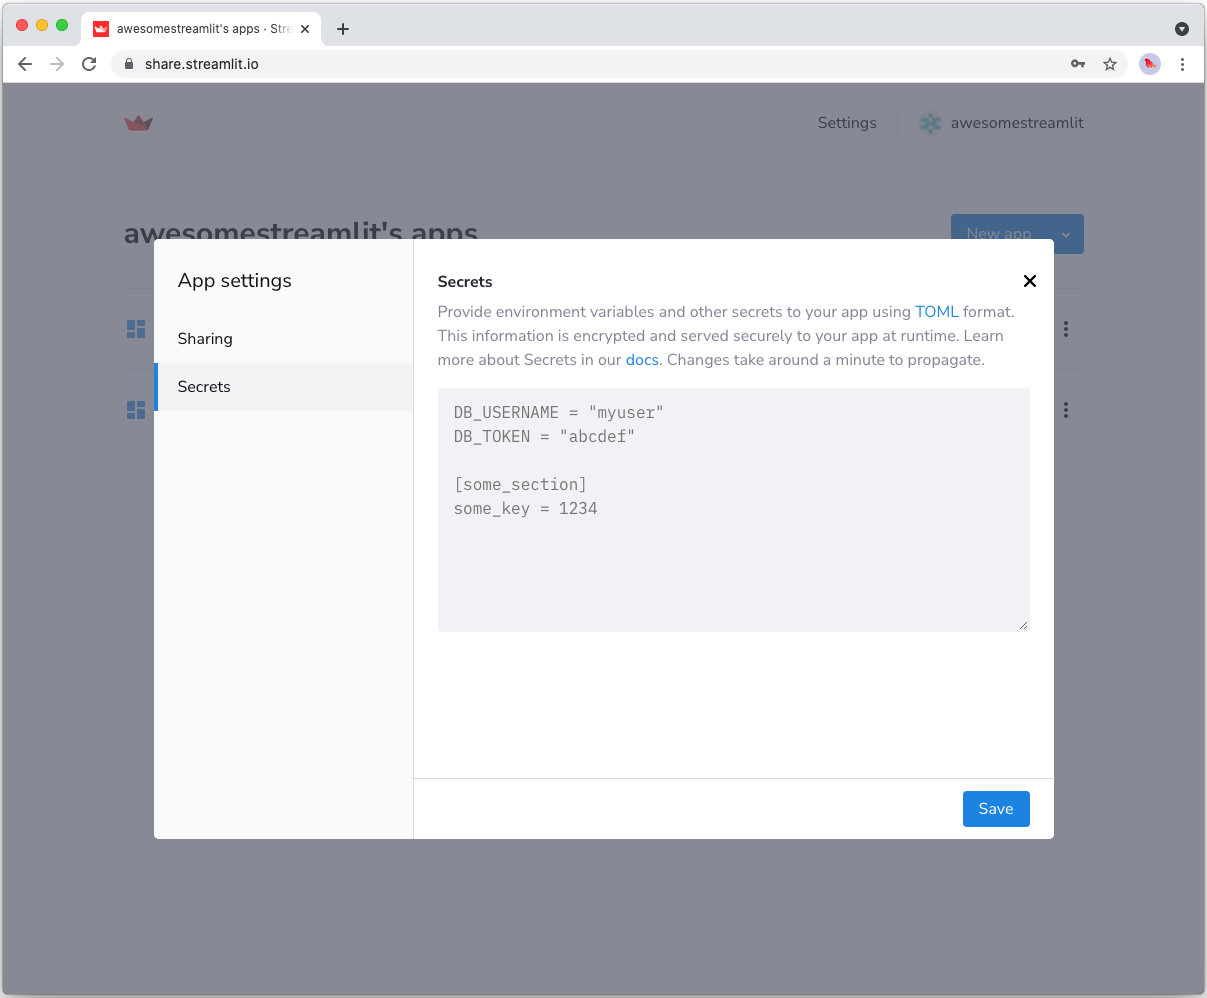
To host your app on Streamlit Community Cloud, you will need to pass your credentials to your deployed app via secrets. Go to the app dashboard and in the app's dropdown menu, click on Edit Secrets. Copy the content of secrets.toml above into the text area. More information is available at Secrets management.
Add FilesConnection and s3fs to your requirements file
Add the FilesConnection and s3fs packages to your requirements.txt file, preferably pinning the versions (replace x.x.x with the version you want installed):
# requirements.txt
s3fs==x.x.x
st-files-connection
Write your Streamlit app
Copy the code below to your Streamlit app and run it. Make sure to adapt the name of your bucket and file. Note that Streamlit automatically turns the access keys from your secrets file into environment variables, where s3fs searches for them by default.
# streamlit_app.py

import streamlit as st
from st_files_connection import FilesConnection

# Create connection object and retrieve file contents.
# Specify input format is a csv and to cache the result for 600 seconds.
conn = st.connection('s3', type=FilesConnection)
df = conn.read("testbucket-jrieke/myfile.csv", input_format="csv", ttl=600)

# Print results.
for row in df.itertuples():
    st.write(f"{row.Owner} has a :{row.Pet}:")
See st.connection above? This handles secrets retrieval, setup, result caching and retries. By default, read() results are cached without expiring. In this case, we set ttl=600 to ensure the file contents is cached for no longer than 10 minutes. You can also set ttl=0 to disable caching. Learn more in Caching.
If everything worked out (and you used the example file given above), your app should look like this:

Still have questions?
Our forums are full of helpful information and Streamlit experts.